Learn how to make a barn quilt that you can proudly display on any wall, or even inside!
It is not complicated and anyone can definitely do it!
Making a barn quilt is a fun way to make a piece of art that can not only be enjoyed by you, but all those who pass or visit your property!
Have you ever driven by an old barn or outbuilding, even a garage… And seen colorful quilt blocks on display? I always smile when I see them!
If you have ever wished to adorn your own property with a lovely piece of art such as this, you’ll be happy to know that it is a project that can be done on any size scale, and without much trouble!
I have always loved spotting barn quilts!
There is something so unique… So bright and cheerful about a barn quilt that I can’t quite put my finger on. But it is almost something like, hope.
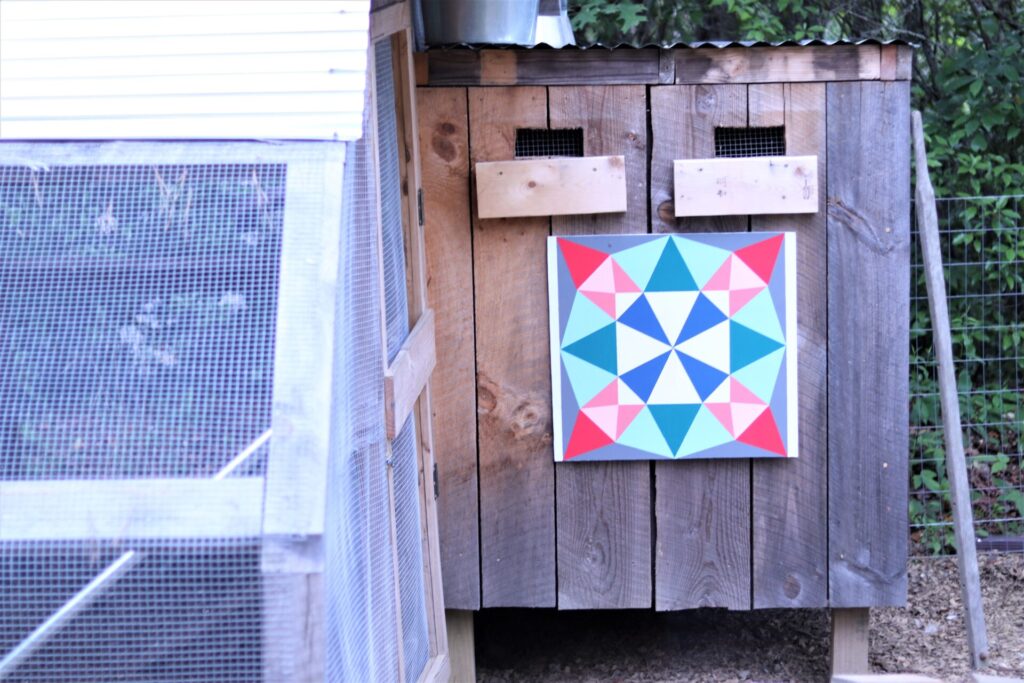
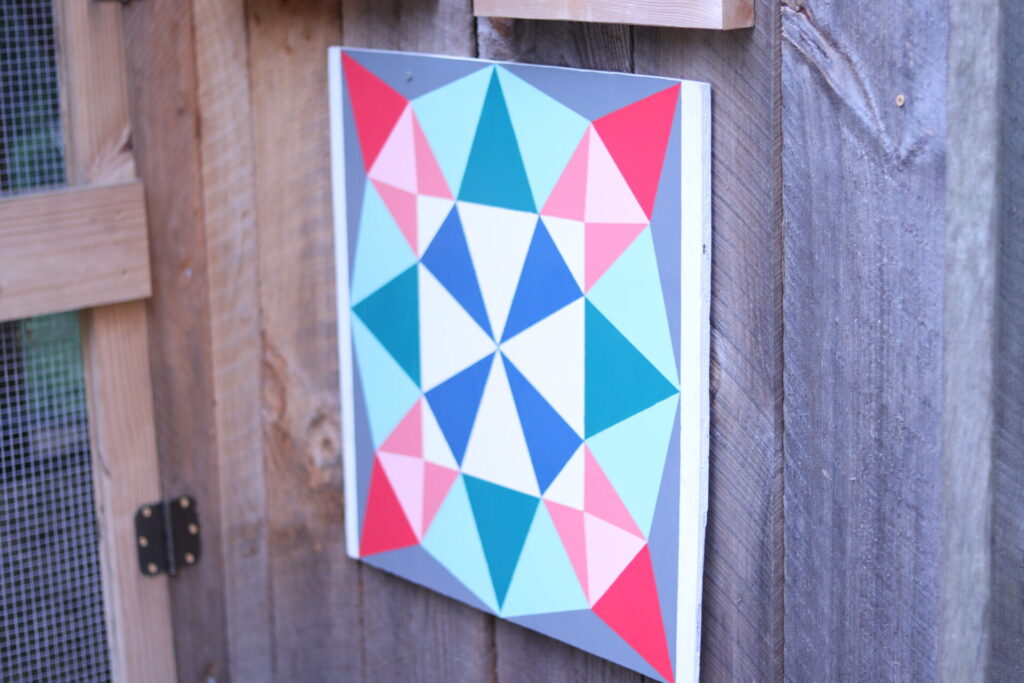
When we built our chicken coop, I knew right away that it would be the perfect spot to put a barn quilt.
Now that we have made our own and love it so much, I told my husband that we need to make another one for the other side facing the driveway!
History on Barn Quilts
Here is an excellent resource for reading about the history of barn quilts and how they became a thing in the United States. There is even a list of books about them and barn quilt trails, where you can visit.
Also, here’s a little video about the American quilt trail movement. Such a neat piece of rural Americana.
{We are a participant in the Amazon Services LLC Associates Program, an affiliate advertising program designed to provide a means for us to earn fees by linking to Amazon.com and affiliated sites.}

Places to Hang a Barn Quilt
- I won’t state the obvious and say barn
- Garage
- Shed
- Chicken coop
- Side of house
- Greenhouse/garden shed
- Indoor wall art
- Front porch
- Eave/peak of house
Supplies Needed to Make a Barn Quilt
Wood cut to the shape you desire – plywood works well
White indoor/outdoor base paint
Design – search online for ideas, or use your favorite quilt pattern
Yard stick or laser level
Pencil to sketch lines
Delicate painter’s tape
Acrylic craft paint or outdoor safe paint
Paint brushes (smaller brush and larger brush) or small foam roller
Glossy spray paint clear coat
Screws to attach
*Product links at the bottom of this post
Watch How to Make A Barn Quilt Video
The purpose of art is washing the dust of daily life off our souls. ~ Pablo Picasso
This post contains affiliate links. If you order through the links, I may get paid a small commission at no extra cost to you.
Directions for Making a Barn Quilt
Everything you need for a barn quilt is very easy to find at a hardware store or your local Home Depot.
Wood –
Choose any size that you wish for your quilt block. You can use 4 pieces of wood together to form a huge square, you can have a small square of plywood cut at the home improvement store… Ask the person working in the lumber area to help you find what you need and tell them the size you need it to be cut! Remember to make sure it will fit in your vehicle first!
You can even make a little barn quilt on a very small scale to display as a painting in your home! Measure your space, and cut a piece of wooden board accordingly. It’s a good idea to sand the edges.
Do remember that if you choose wood that is very rough, like rough hewn or rough reclaimed wood, the uneven surfaces will be very difficult to paint and get a sharp, straight line. I recommend using a smooth surface to get those crisp lines you need in a quilt pattern.
Base Coat –
Paint the entire surface of the wood with an outdoor safe paint as a base. Paint the whole thing! I went with a glossy white paint. You may need at least a second coat, if not a third.
In retrospect, I should have painted both sides to prevent moisture damage to the back. I suggest you do that, and I will be doing that if I make another for outdoor use.
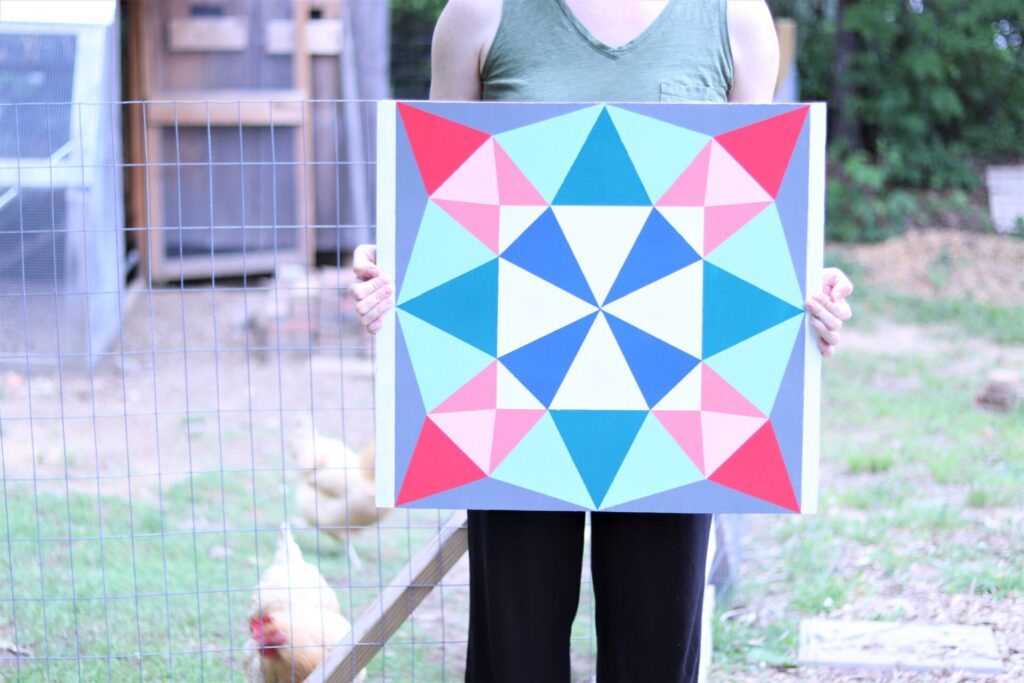
Barn Quilt Designs –
Select your design ahead of time. Do some barn quilt research and figure out the design that speaks to you. A good way to find ideas is to just scroll around online, and do an image search for barn quilts. You could even take inspiration from fabric quilts, if the pattern is simple enough.
Decide on your favorite barn quilt pattern and colors. Contrasting color next to each other really make the design pop. Don’t worry, you don’t have to be a graphic designer to make a beautiful quilt block pattern.
Use a yard stick to measure and lay out the design in light pencil lines on the piece. It may be easier to keep it simple, and use larger blocks and a less intricate pattern if you are concerned about the laying out and painting of the design.
The one we settled on was not too much to handle, and the shapes were large enough to not be tedious.
Pull up your inspiration photo to look at while you work.
Tape –
I recommend the delicate or gentle type of painters tape, it worked well for me. This Frog Tape also looks like a good choice.
Tape off several sections at a time, whatever ones can be worked on at once without the tape getting in the way.
Use your thumbnail to seal edge of tape down well, creating a straight line, and tight seal. This helps prevent bleeding and gives you a nice, straight edge.
When removing tape, do it slowly and carefully. I had equal success with removing the tape when paint was wet or dry.
Paint –
I used a selection of acrylic craft paints. The cheap craft paint in the Walmart or Target craft section did just fine. This paint I linked is very cheap on Amazon also. They should be around $0.50 – $1.
Paint inside your tape pattern, waiting for each coat to dry before you add another, until your coats of paint provide the coverage you like. Remember to remove the tape slowly and carefully.
Seal –
After the project is all painted and dried, the next step is to take it outside in the fresh air and spray the entire board well with a can of glossy, clear coat that is safe for indoor/outdoor. This will help seal the wood and prevent peeling, chipping and rotting.
Hang –
We kept it simple and hung the finished piece with two long screws on the top, straight into the chicken hutch. A level can come in handy to make sure it is straight.
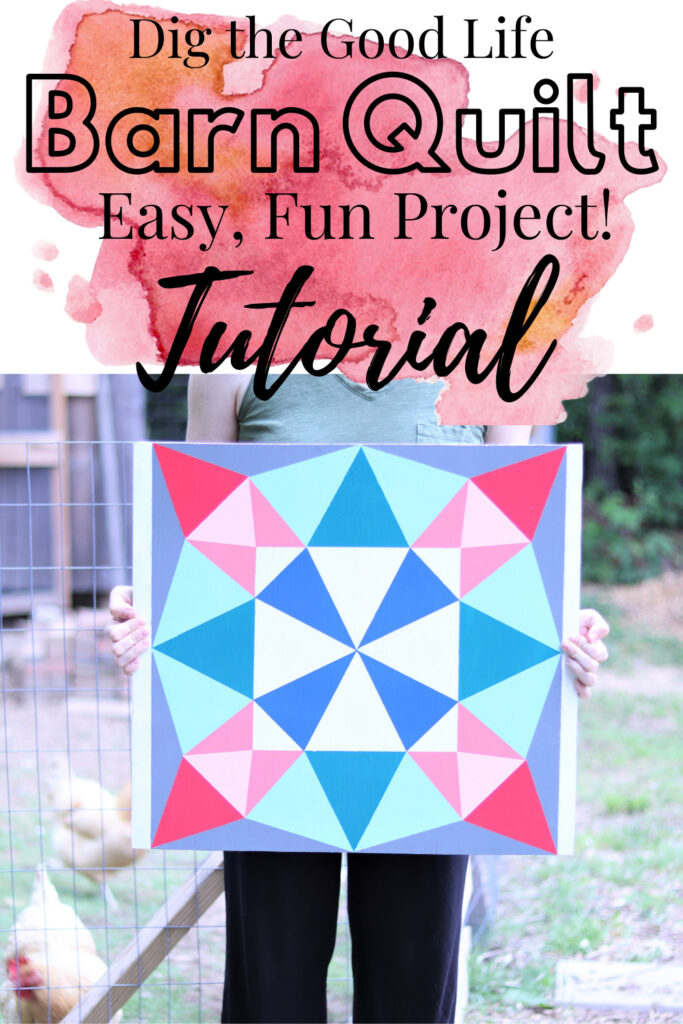
Pin For Later
(Hover over or tap image, and click on little red box that appears in the top corner, save to your pinterest board.)

Shopping List And Links:
History and Info on Barn Quilts
You Might Also Like
Where to Get the Best Seeds For Your Garden
Packing An Essential Oil Purse Kit

Love this!! We’re moving to a new house and plan on having a chicken coop. Great idea to put a barn quilt on a coop!! Will definitely be saving this.
This is great Hope! We discovered lots of barn quilts on our summer trip to Prince Edward Island one year, and I have been wanting to make one of our own. I love the bright colours of yours.